
February Community Events Schedule - 2025
Our community events for February are here! We have a huge range of titles, there's something for everyone this month with NSE.
last year


Hoyoverse has finally released a new nation in Teyvat, which is the long-awaited Sumeru. The traveller and Paimon must find Lesser Lord Kusanali who must take over the role as the Archon of Wisdom from Greater Lord Rukkhadevata. This lush and vibrant nation full of flora and fauna gives us a break from the action-packed nation that was Inazuma in the traveller and Paimon’s last adventure.
A new area in Teyvat: Sumeru
With Sumeru released, there will be more chests, puzzles, and mechanics for players to try out and try to complete for 100% and get Primogems.
We have new puzzles, like the stone pillar seals which require a pyro character to destroy them and take out the enemy trapped in the seal, or withering zones which act like the Chasm’s Lumenstone needed to destroy the Oozing mud but require the use of Dendrograna to take out the roots and defeat the enemies to purify the withered area. Certain areas have Energy Extraction Devices found in Eremite camps which will require control keys to put it under control and get a luxurious chest from it as a reward.
With puzzles, there are also new mechanics making exploration easier. The Four-Leaf Sigils are used to traverse the map using a grappling hook to get from one area to another. The Vintage Lyre, which can be unlocked via a side quest, can be used situationally. It acts like the Ocarina from the Legend of Zelda, where you can play specific songs to unlock items with different uses, whether it is to teleport to an area via a Teleporter or complete a gate speed run to collect all the petals and return for a reward.
Archon Quests
A new Archon quest is unlocked from the get-go at a certain AR level. From meeting Collei and Tighnari in Gandharva Ville to a RE: Zero-like story with Nilou and Dehya. Learning about the Sumeru Akademiya, obtaining the Akasha Terminal, dealing with Eremites, with Alhaitham and searching for the Dendro Archon Lesser Lord Kusanali known as Nahida. Nilou preparing herself to dance for the Sabzeruz Festival to honour the birth of Lesser Lord Kusanali and spring life onto Sumeru City.
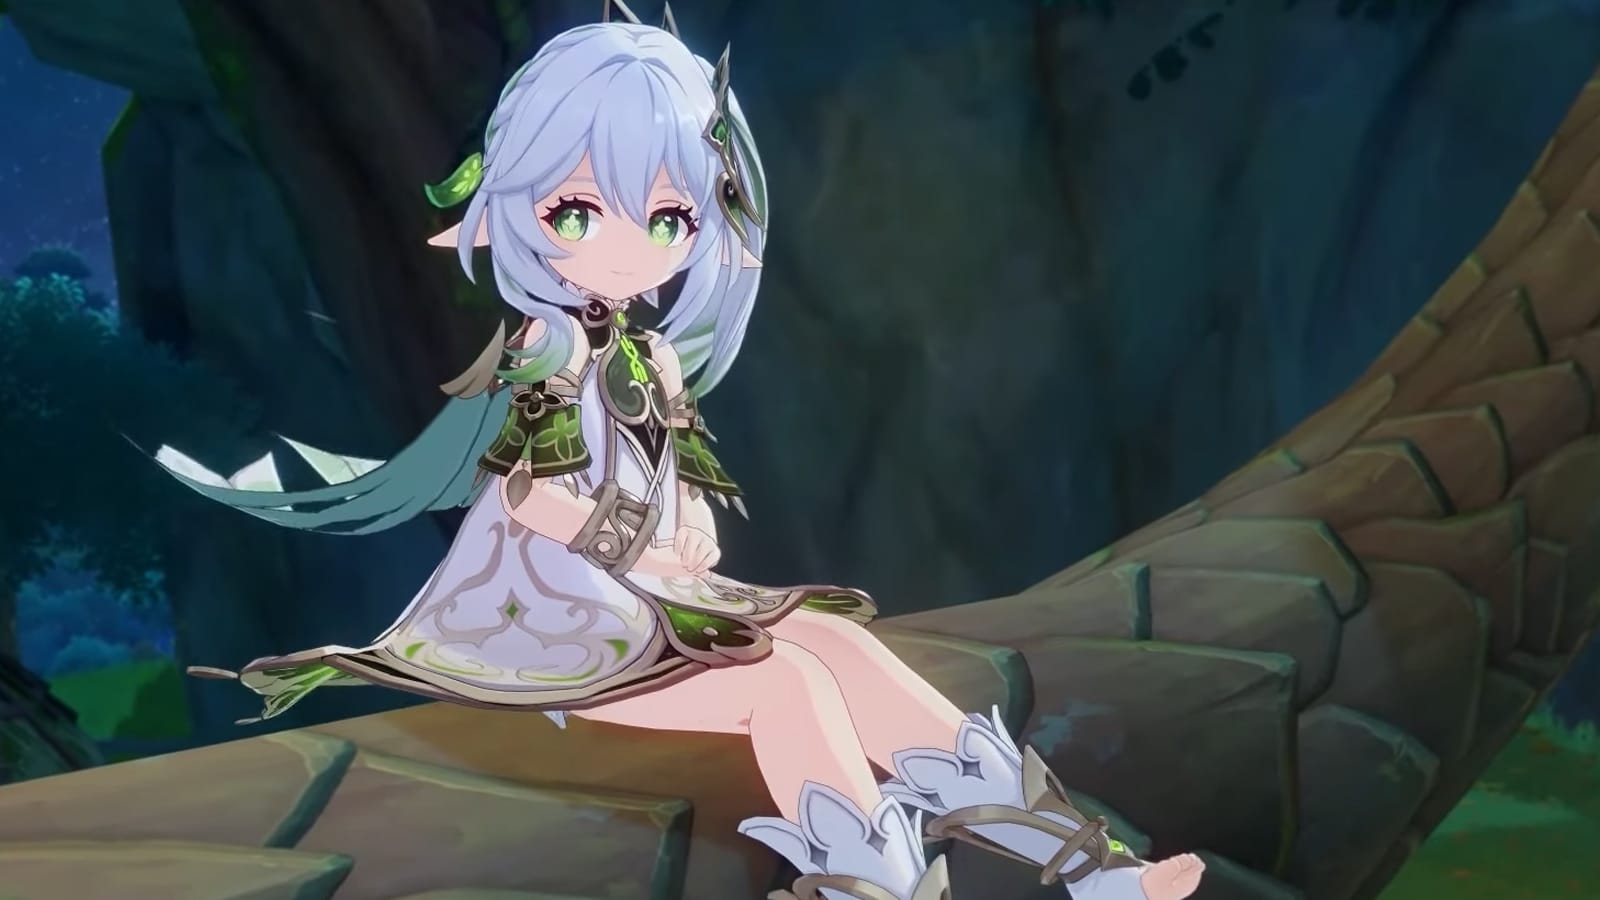
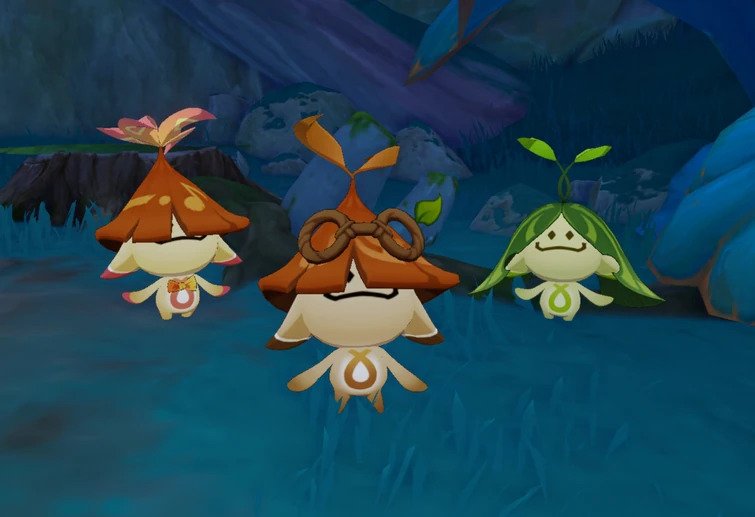
After the Archon stories released so far, the side story goes over the Aranaras, a race which is compared to Koroks from the Zelda games that are found in Vanarana. This is where you obtain the Vintage Lyre and learn different songs to unlock new areas and mechanics. You will find the Vanarana tree to spend Dendro sigils to obtain rewards (like the Sacred Sakura from Inazuma), such as shrine keys, Midlander billets for the Sumeru craftable weapons and much more.
Quality-of-life changes
There have been a few quality-of-life changes added in the 3.0 patch.
More team comp loadouts
The first change is that you can now have up to ten team loadouts, making experimenting with new team comps and characters easier. For example, I now have a Vape team for Hu Tao and Diluc, a Freeze team for Ganyu and a Swirl team for Xiao and Heizou. Personally, I think this is a great change that was needed in the game.
More Artifact sets in Artifact Strongbox
The second change has been an increase in the number of artifact sets you can reroll in Artifact Strongbox. The artifact set added are:
These sets, especially elemental sets, will be less tedious to farm. So, farming the Crimson witch for Hu Tao or Diluc and farming Viridescent Venerer for Heizou and Jean will not be such a pain.
Hydro Resonance buff
Another change is a buff to hydro resonance. Before, the hydro resonance would increase healing by 30%. But, healing in the late game was not as important, so the developers changed it to increasing max HP by 25%. This is a massive buff for Hu Tao and Yelan, as their kits depend on their HP stat. This is also strong for shield units like Diona and Zhongli, as the more HP they have, the stronger the shield.
New enemies and bosses
Sumeru provides new mobs, enemies, and a new faction that players must go up against.
The Eremites
![]()
The Eremites are an organised group of mercenaries based in Sumeru that will take any job as long as the pay is worth it to them. They resemble the treasure hoarders we know and love, although they conduct business instead of committing theft for the fun of it.
From the elegance Katar-wielding Eremite Desert Clearwater to the dual blade-wielding Eremite Sunfrost, this faction is no joke. Strategy is involved when going up against the Eremites with buffs and elemental applications, so players need to stay on their toes to not get combo-ed to Oblivion.
Sumeru Beasts
![]()
The fauna in Sumeru are beasts that live in the Sumeru habitat. They are prone to attacking the player but can provide raw meat, so cooking dishes like Sweet Madames are less painful. There are currently three types of Sumeru beasts: Rishboland Tigers, which are felines that can lunge and claw the player, Spinocrocdiles that live in the rivers of Sumeru, and the Shaggy Sumpter Beasts, which can be found not only in its habitat but also used to transport goods (as seen in Hilichurl), Eremites and Treasure hoarder camps. Shaggy Sumpter Beast can also drop enemy items if they are found in their camps too.
Ruin Drakes
Ruin Drakes are automatons (like the Ruin Guards we know too well). There are currently two types of Ruin Drakes: The Skywatch and Earthguard.
The Skywatch prioritises air attacks, like slamming its tail if the player is too close or shooting a ton of bullets and homing missiles if far away. Its weakness is a bow user shooting its wings. Shooting both would cause it to be vulnerable to attacks.
The Ruin Earthguard deals ground attacks like tail sweeps, charging toward the player, and melee attacks. Their attacks have a massive hitbox covering the front and behind, making it difficult to dodge them if not dodging in the right place and punishing you for bad positioning. It can also deal elemental damage based on the elemental attack they have been hit with, raining elemental bullets around them.
Fungi
Fungi are the common type of enemy you will find all over Sumeru that act like slimes. There are five types of fungi; two of them are Hydroshroom and Dendroshroom, which are big and have more health in addition to the Dendro, Anemo and Electro Fungus which are smaller enemies that are easier to defeat.
Bosses
The update also includes two new ascension bosses; the Electro Regisvine is another boss in the Regisvine family who is Electro and is vulnerable to Cryo and Dendro damage.
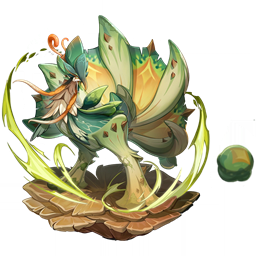
The other boss is the Jadeplume Terrorshroom. The Jadeplume Terrorshroom is a peacock with mushrooms as its legs. Specific team comps will benefit and others can cause you issues. Hydro characters would make the boss get harder, as it can spawn enemies when affected by hydro. Its major weakness is Electro and Cryo. It will do a devastating attack, although it will be exhausted afterwards, making it easy to take it down quickly.
The 3.0 Banners
This update provides us with three new characters hailing from Sumeru and fan favourite reruns!
Phase 1 banners
The first two banners provide us with Tighnari, a forest watcher in Gandharva Ville who prefers a solitary life in the forest over joining the Sumeru Akademiya. With him, Zhongli gets his third rerun. These banners will contain the new Dendro 4-star Collei too, with Fischl and Diona joining her. I find the first wave to be a great banner for players starting out since Fischl can be used as battery and Diona as support and a great substitute, especially at C6, if they do not have Zhongli or Bennett available.
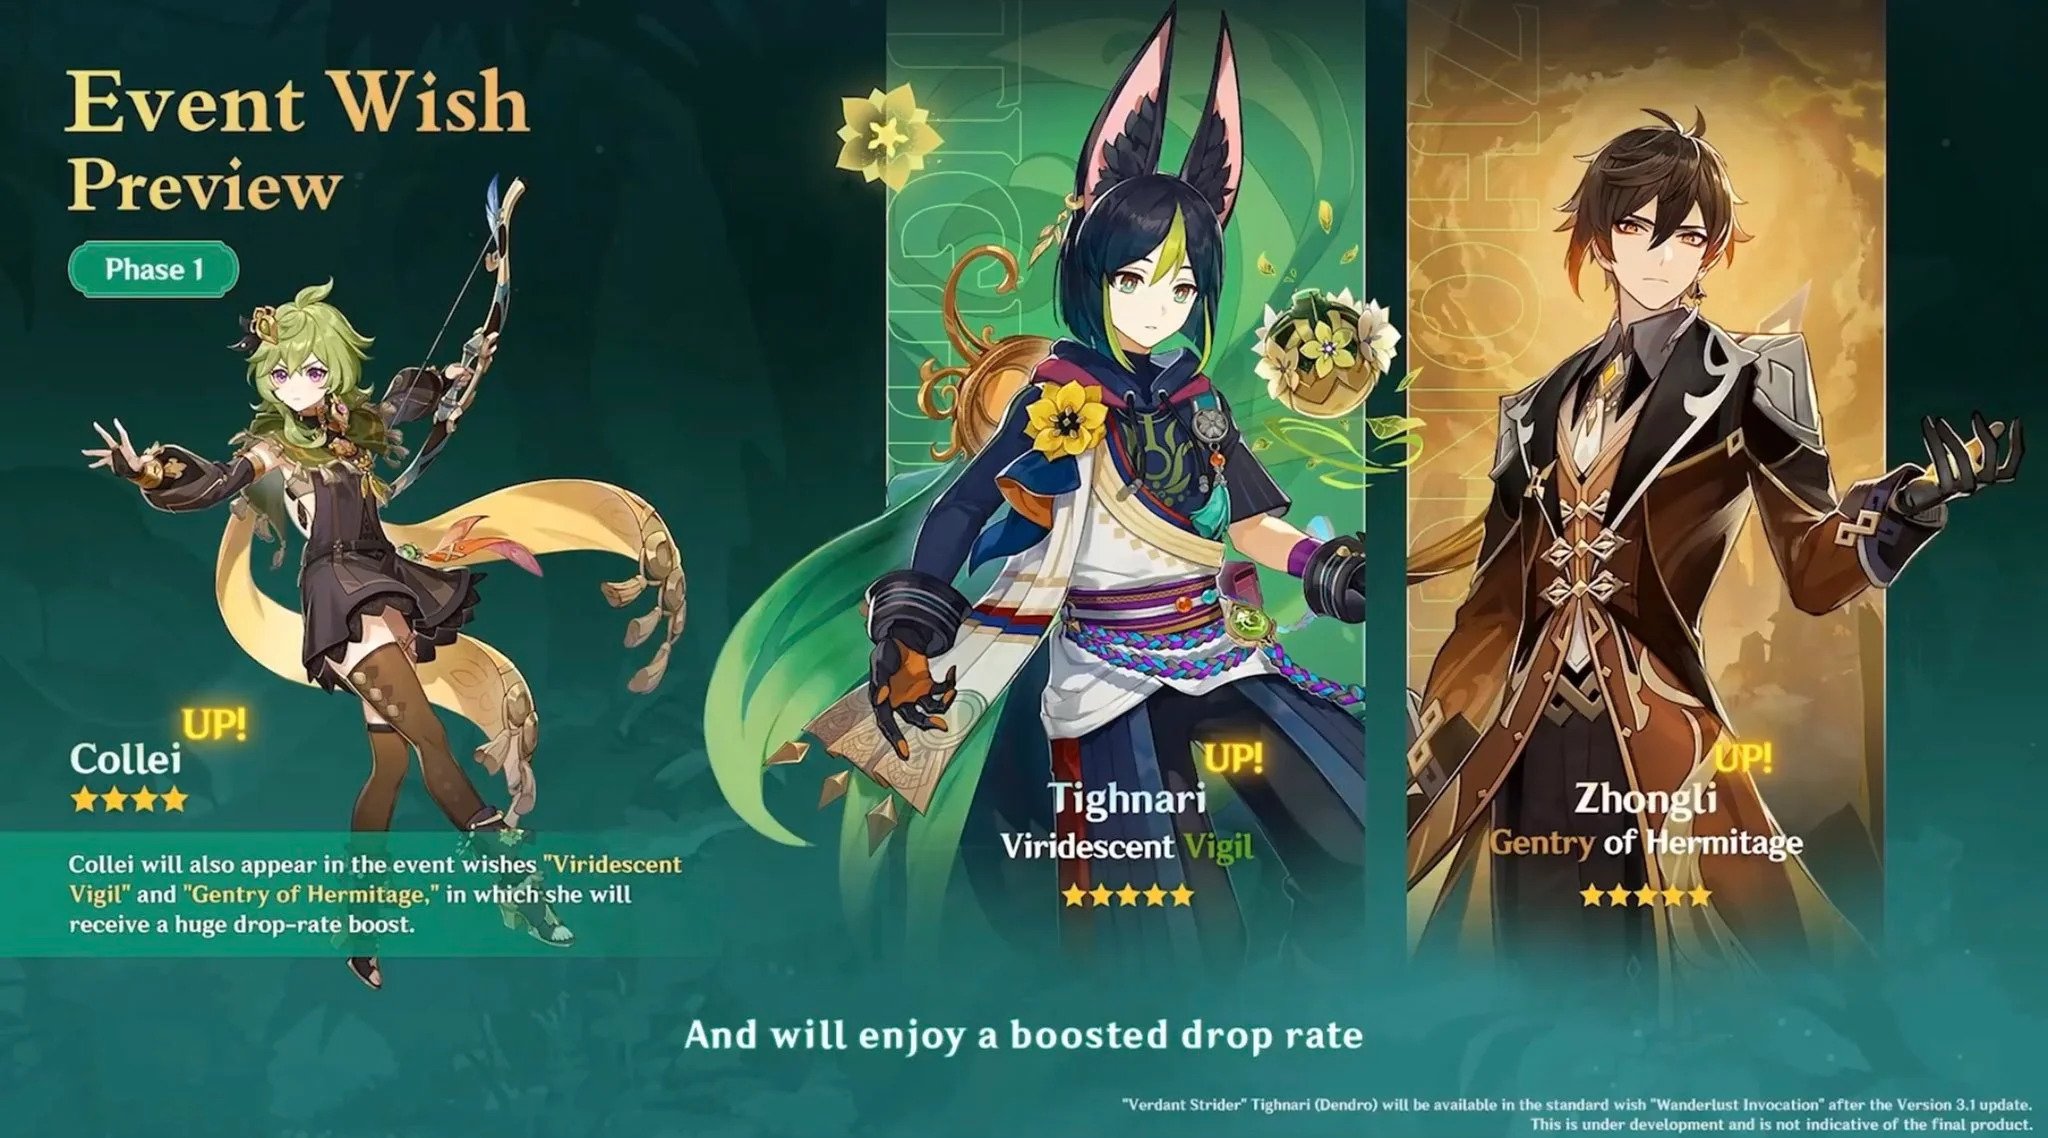
Tighnari
Tighnari is a Dendro main DPS who excels at applying pressure on bosses and solo target enemies with his charge attack boasting two levels, like Ganyu.
Unlike Ganyu, who has crowd control on her level 2 charge, Tighnari’s Level 2 charge shoots out four wreath arrows that home in on enemies that deal Dendro damage.
His elemental skill offers an AOE and drastically decreases the charge time of his Level 2 charge attack with a limit of three charged shots.
His burst shoots out 6 Tanglevine shafts that will home in on enemies and deal Dendro damage. When hit, another set of Tanglevine shafts will hit the opponent again dealing more Dendro damage to enemies.
His passive displays the location of Sumeru items on the map, making farming for ascension materials easier.
A first for Genshin, Tighnari will be added to the standard banner on the next version onwards to represent Sumeru and Dendro characters. So, this would be the best time to either wait and hope you lose that 50/50 next patch or use your hard-earned Primogems to guarantee him. The standard banner did need more 5-star characters added, as the game’s roster is getting bigger and bigger.
Collei
Collei is a decent Dendro support that will help with Dendro reactions.
Her skill lets her shoot out a boomerang that deals Dendro damage to enemies. Just like a boomerang, it will return to the party member as well which if positioned well, will apply, and deal more Dendro damage.
For her burst, she throws Cuilein-Anbar which homes in on the closest enemy like Diona’s Signature Mix burst. Cuilein-Anbar will deal AOE Dendro damage to enemies caught in the AOE.
Collei’s passive is that her gliding stamina usage will be decreased by 20% just like Amber.
Phase 2 banners
The second set of banners are reruns with one new 4-star character being Dori. The reruns are Ganyu and Kokomi. Ganyu is a must-pull DPS for her being amazing at crowd control and damage and Kokomi excels in support and gaining more relevance due to the Ocean-Hued Clam artifact set. The 4 stars joining Dori are Sucrose and Xingqiu. This is yet another amazing banner for fresh players since Xingqiu is great at applying Hydro and fits in Vape comps and the Raiden national comp, while Sucrose is an amazing alternative to Kazuha and Venti, who can deal considerable amounts of Swirl damage with the use of her skill and her burst.
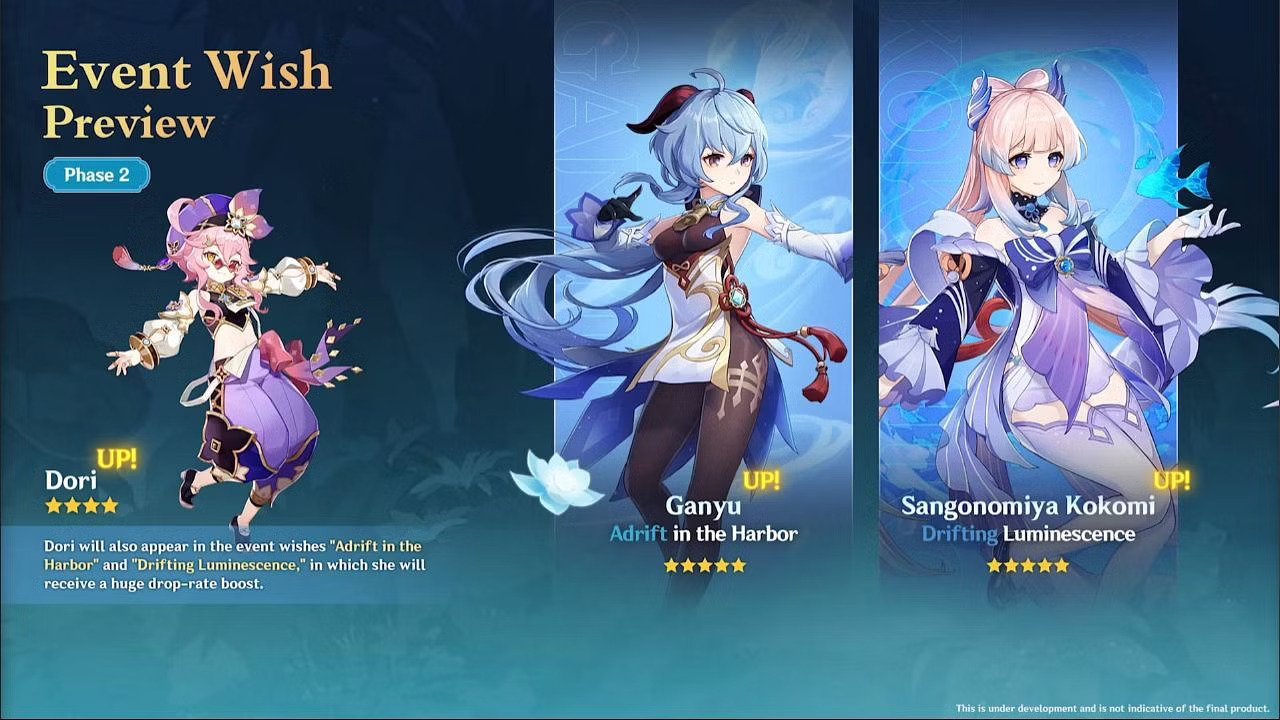
Dori
Dori excels at restoring energy and healing to party members. Although, unlike Fischl or Diona, Dori’s role is locked behind her burst so having an energy recharge weapon and energy recharge sands will be needed for her burst to come out often.
Dori’s skill shoots Troublemaker shots, which deal Electro damage. But when those shots hit, it will create more rounds that track and deal more Electro damage.
Her burst, Jinni, will provide healing based on Dori’s max hp and can regenerate energy for the team. The connector between Jinni and the character will deal Electro damage every four-tenths of a second.
Her passive is that she has a chance to refund a portion of the crafting materials of character and weapon enhancement materials.
New Artifact sets and craftable weapons
Like with every region of Teyvat, there will be new weapon sets and artifact sets for every region.
New craftable weapons
The new craftable weapons are:
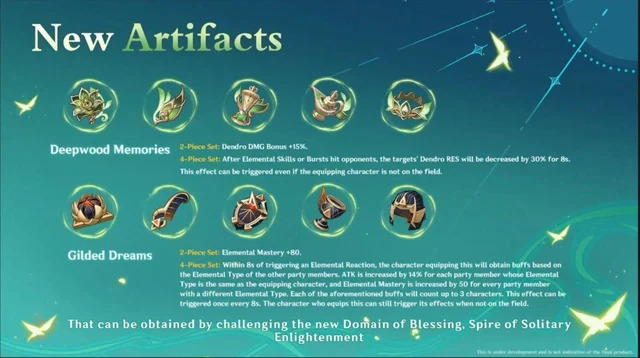
The new artifact sets are:
Deepwood Memories:
2-piece set: Increases Dendro damage by 15%
4-piece set: After Elemental Skills or Bursts hit opponents, the targets’ Dendro RES will be decreased by 30% for 8s. This effect can be triggered even if the equipping character is not on the field.
Which character would benefit from this set?
This is a notable set for Dendro support characters like Collei who excels at Dendro reactions by dealing more Dendro damage and reducing the enemy’s resistance to Dendro attacks especially if paired with Tighnari.
Gilded Dreams:
2-piece set: Elemental Mastery increased by 80.
4-piece set: Within 8s of triggering an Elemental Reaction, the character equipping this will obtain buffs based on the Elemental Type of the other party members. ATK will be increased by 14% for each party member whose Elemental Type is the same as the equipping character, and Elemental Mastery is increased by 50 for every party member with a different Elemental Type. Each of the buffs will count up to three characters. This effect can be triggered once every 8s. The character who equips this can still trigger its effects when not on the field.
Which character would benefit from this set?
This set is good on characters which require a boost of EM or characters that scale off EM. This is also an effective way to boost attack power on characters that have the same elemental type as the one using the artifact set.
Final thoughts
My impression of this update is that I find it a breath of fresh air after filler patches and FOMO events (except for 2.7 with the Chasm). Every new location announced will bring old and new players to the game.
The puzzles were cool and interesting, giving me serious Ocarina of time vibes in some cases. They got me thinking about how to beat the puzzle and it never gets old. Personally, one of my favourite puzzles in Genshin so far.
The story so far is great and there was not a character I did not like or found annoying. The side story, however, had me at the edge of my seat constantly especially coming close to the end of the quest.
The new enemies were cool too, and seeing the Eremites dance and having unique animations added more flavour to them. Although, the Eremites were a pain to defeat, since they had no hit stun whatsoever. I think it was intended to reduce aggressive players and to have more strategy involved.
I do not see character banners as content, but from a new player's perspective, this is an amazing time to roll on the banners, as even the 4 stars are amazing for beginners to get to grips with reaction comps and passive damage/support. The 5 stars also are very beginner-friendly, with characters like Zhongli and Ganyu for support and main DPS, respectively.
Personally, if you are new to Genshin or a day one player, this is a perfect time to play Genshin, as Sumeru still has more to offer.
Follow TheDarkVictini on socials!
Instagram
Twitter
TikTok
YouTube


